 "Noah - Now with more boost." (antriebverliebt)
01/04/2016 at 14:05 Ľ Filed to: Wrenching
 1
1
 28
28|
"Noah - Now with more boost." (antriebverliebt)
01/04/2016 at 14:05 Ľ Filed to: Wrenching | 1
| 28 |
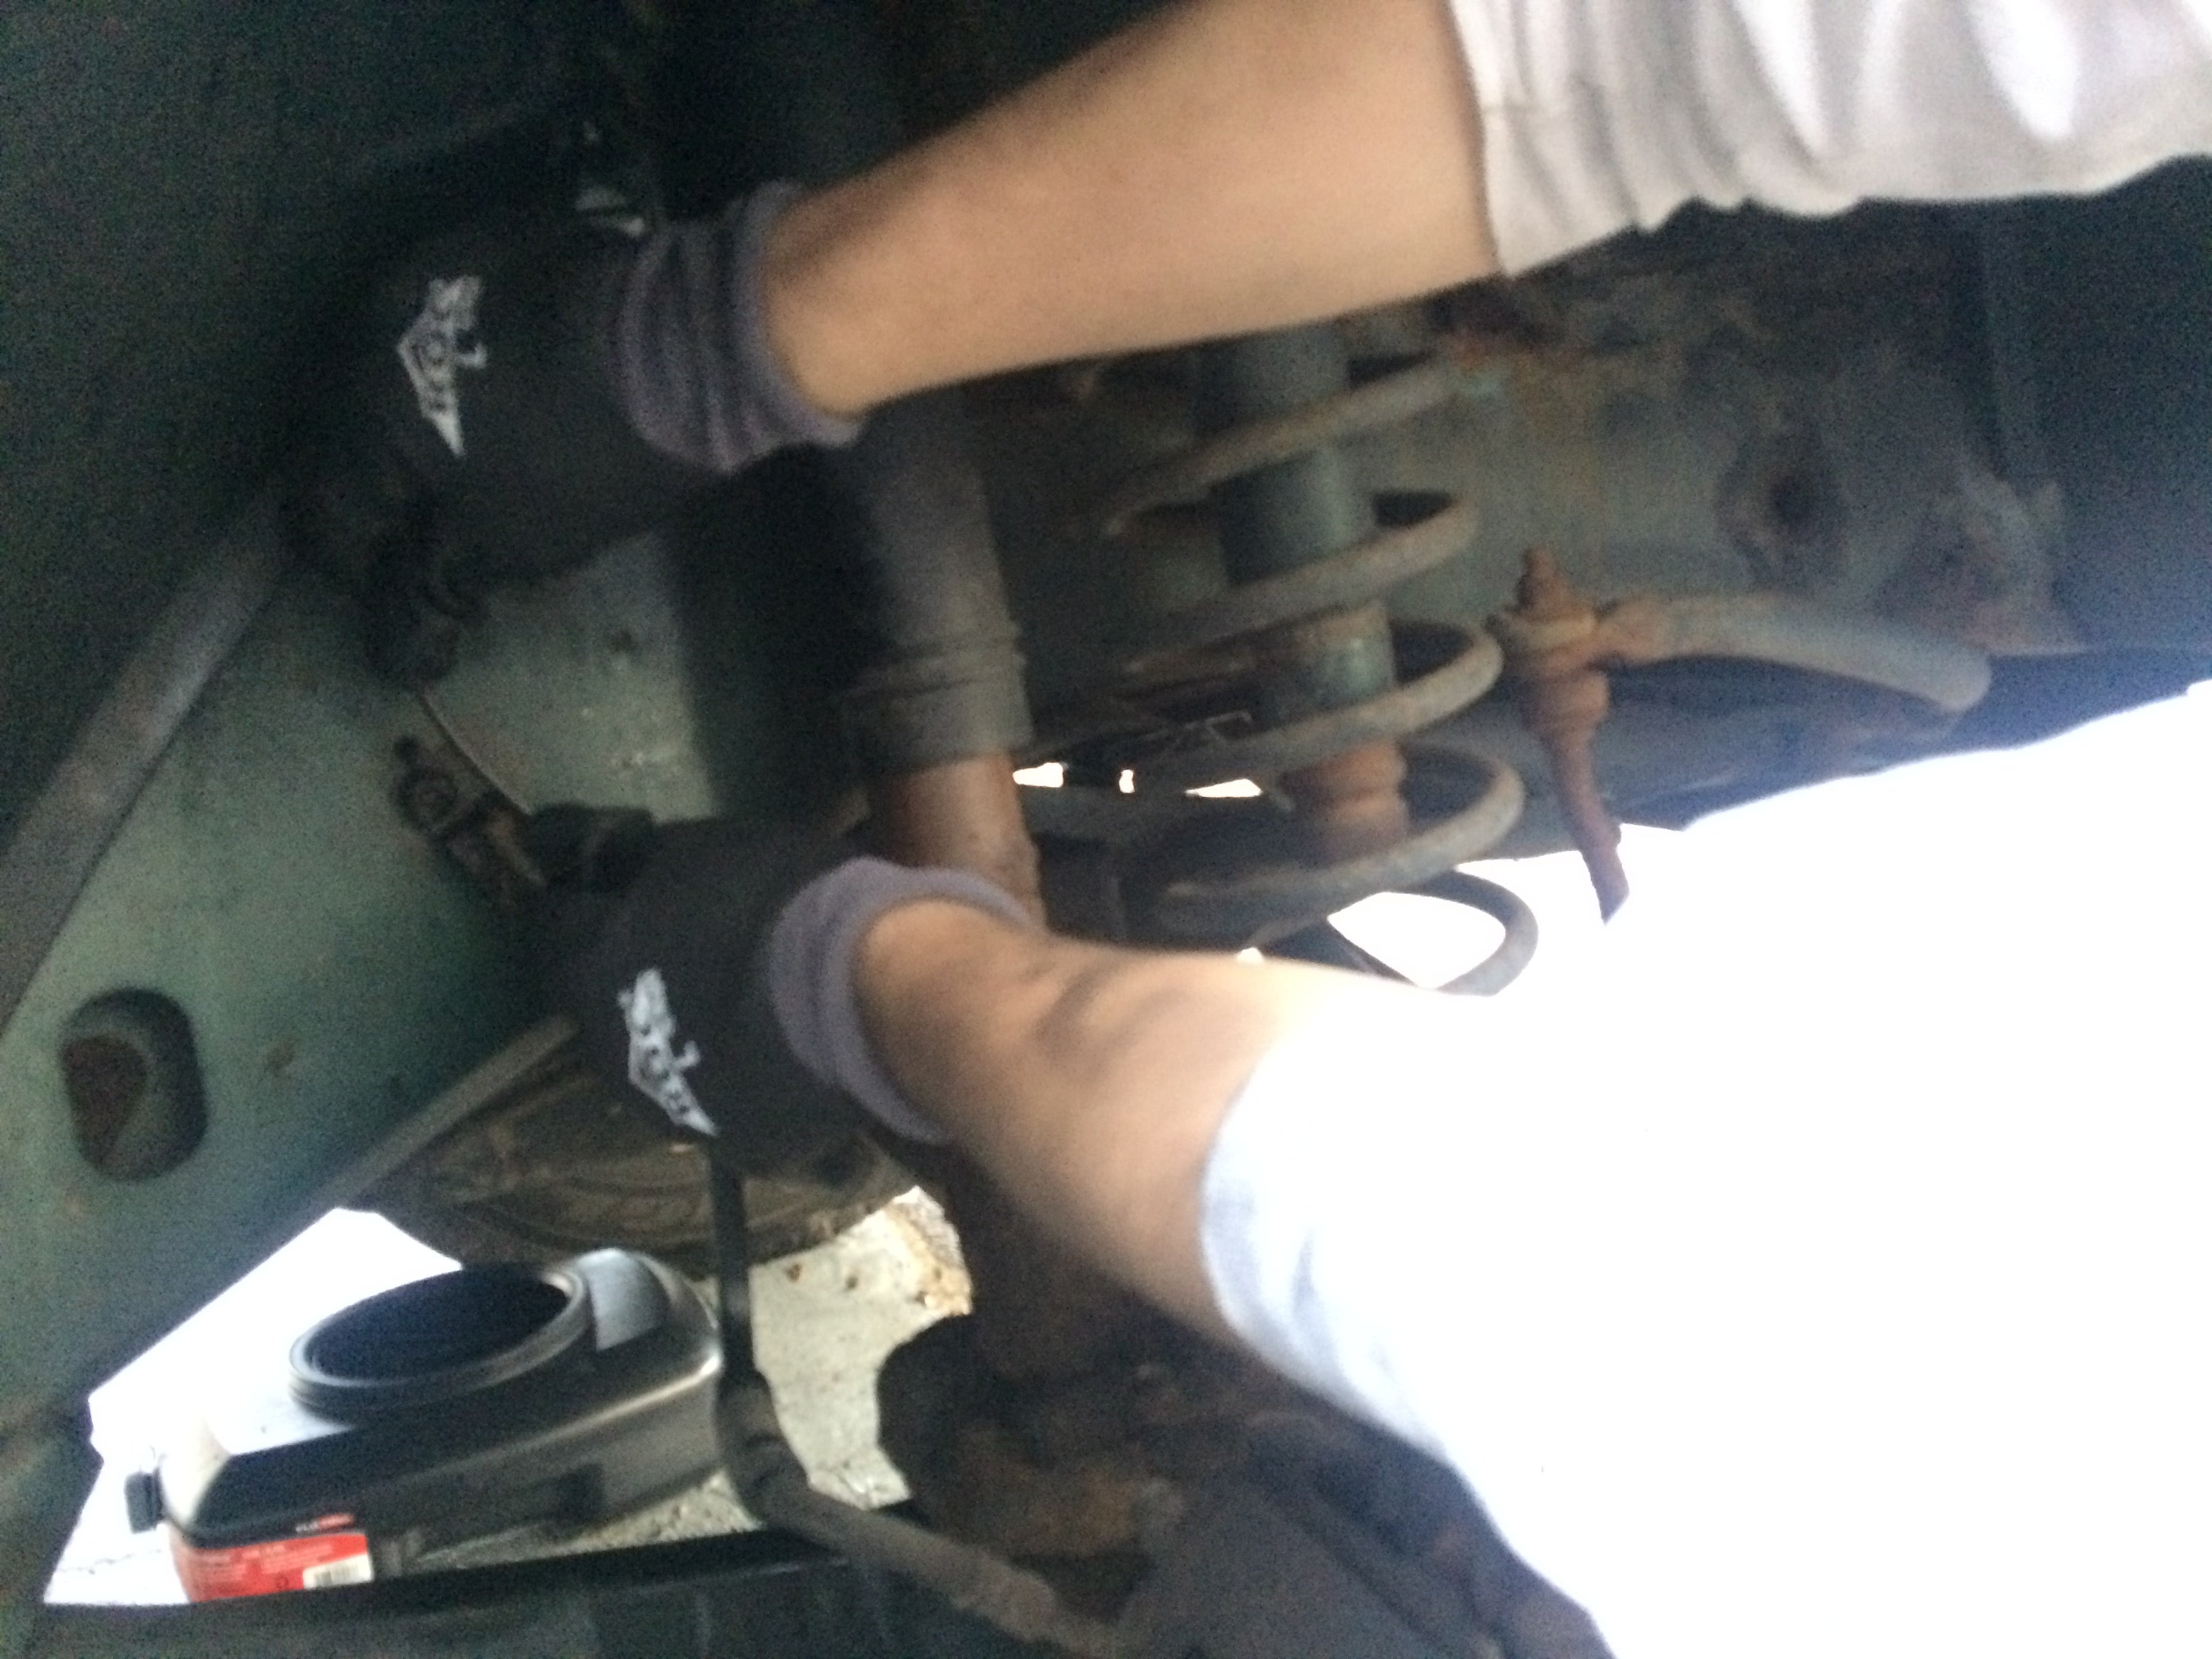
My buddy recently purchased an XJ Cherokee to save himself from his horrendously unreliably 250K mile E36 stance project. So of course, he experienced catastrophic failure within 2 days of owning the car. A rusted out hard line burst, leaving him stranded on Christmas eve.
Finding a pre-bent hard line was out of the question. Our local Jeep dealerships didnĺt have any in stock, and even if they did, installing it would have been extremely difficult due to the hard lineĺs location. Itĺs clipped to the firewall behind the ancient wiring harness ratĺs nest. That said, the line that broke operated the front passenger side caliper, so everything we needed to replace was in the engine bay, which was fortunate.
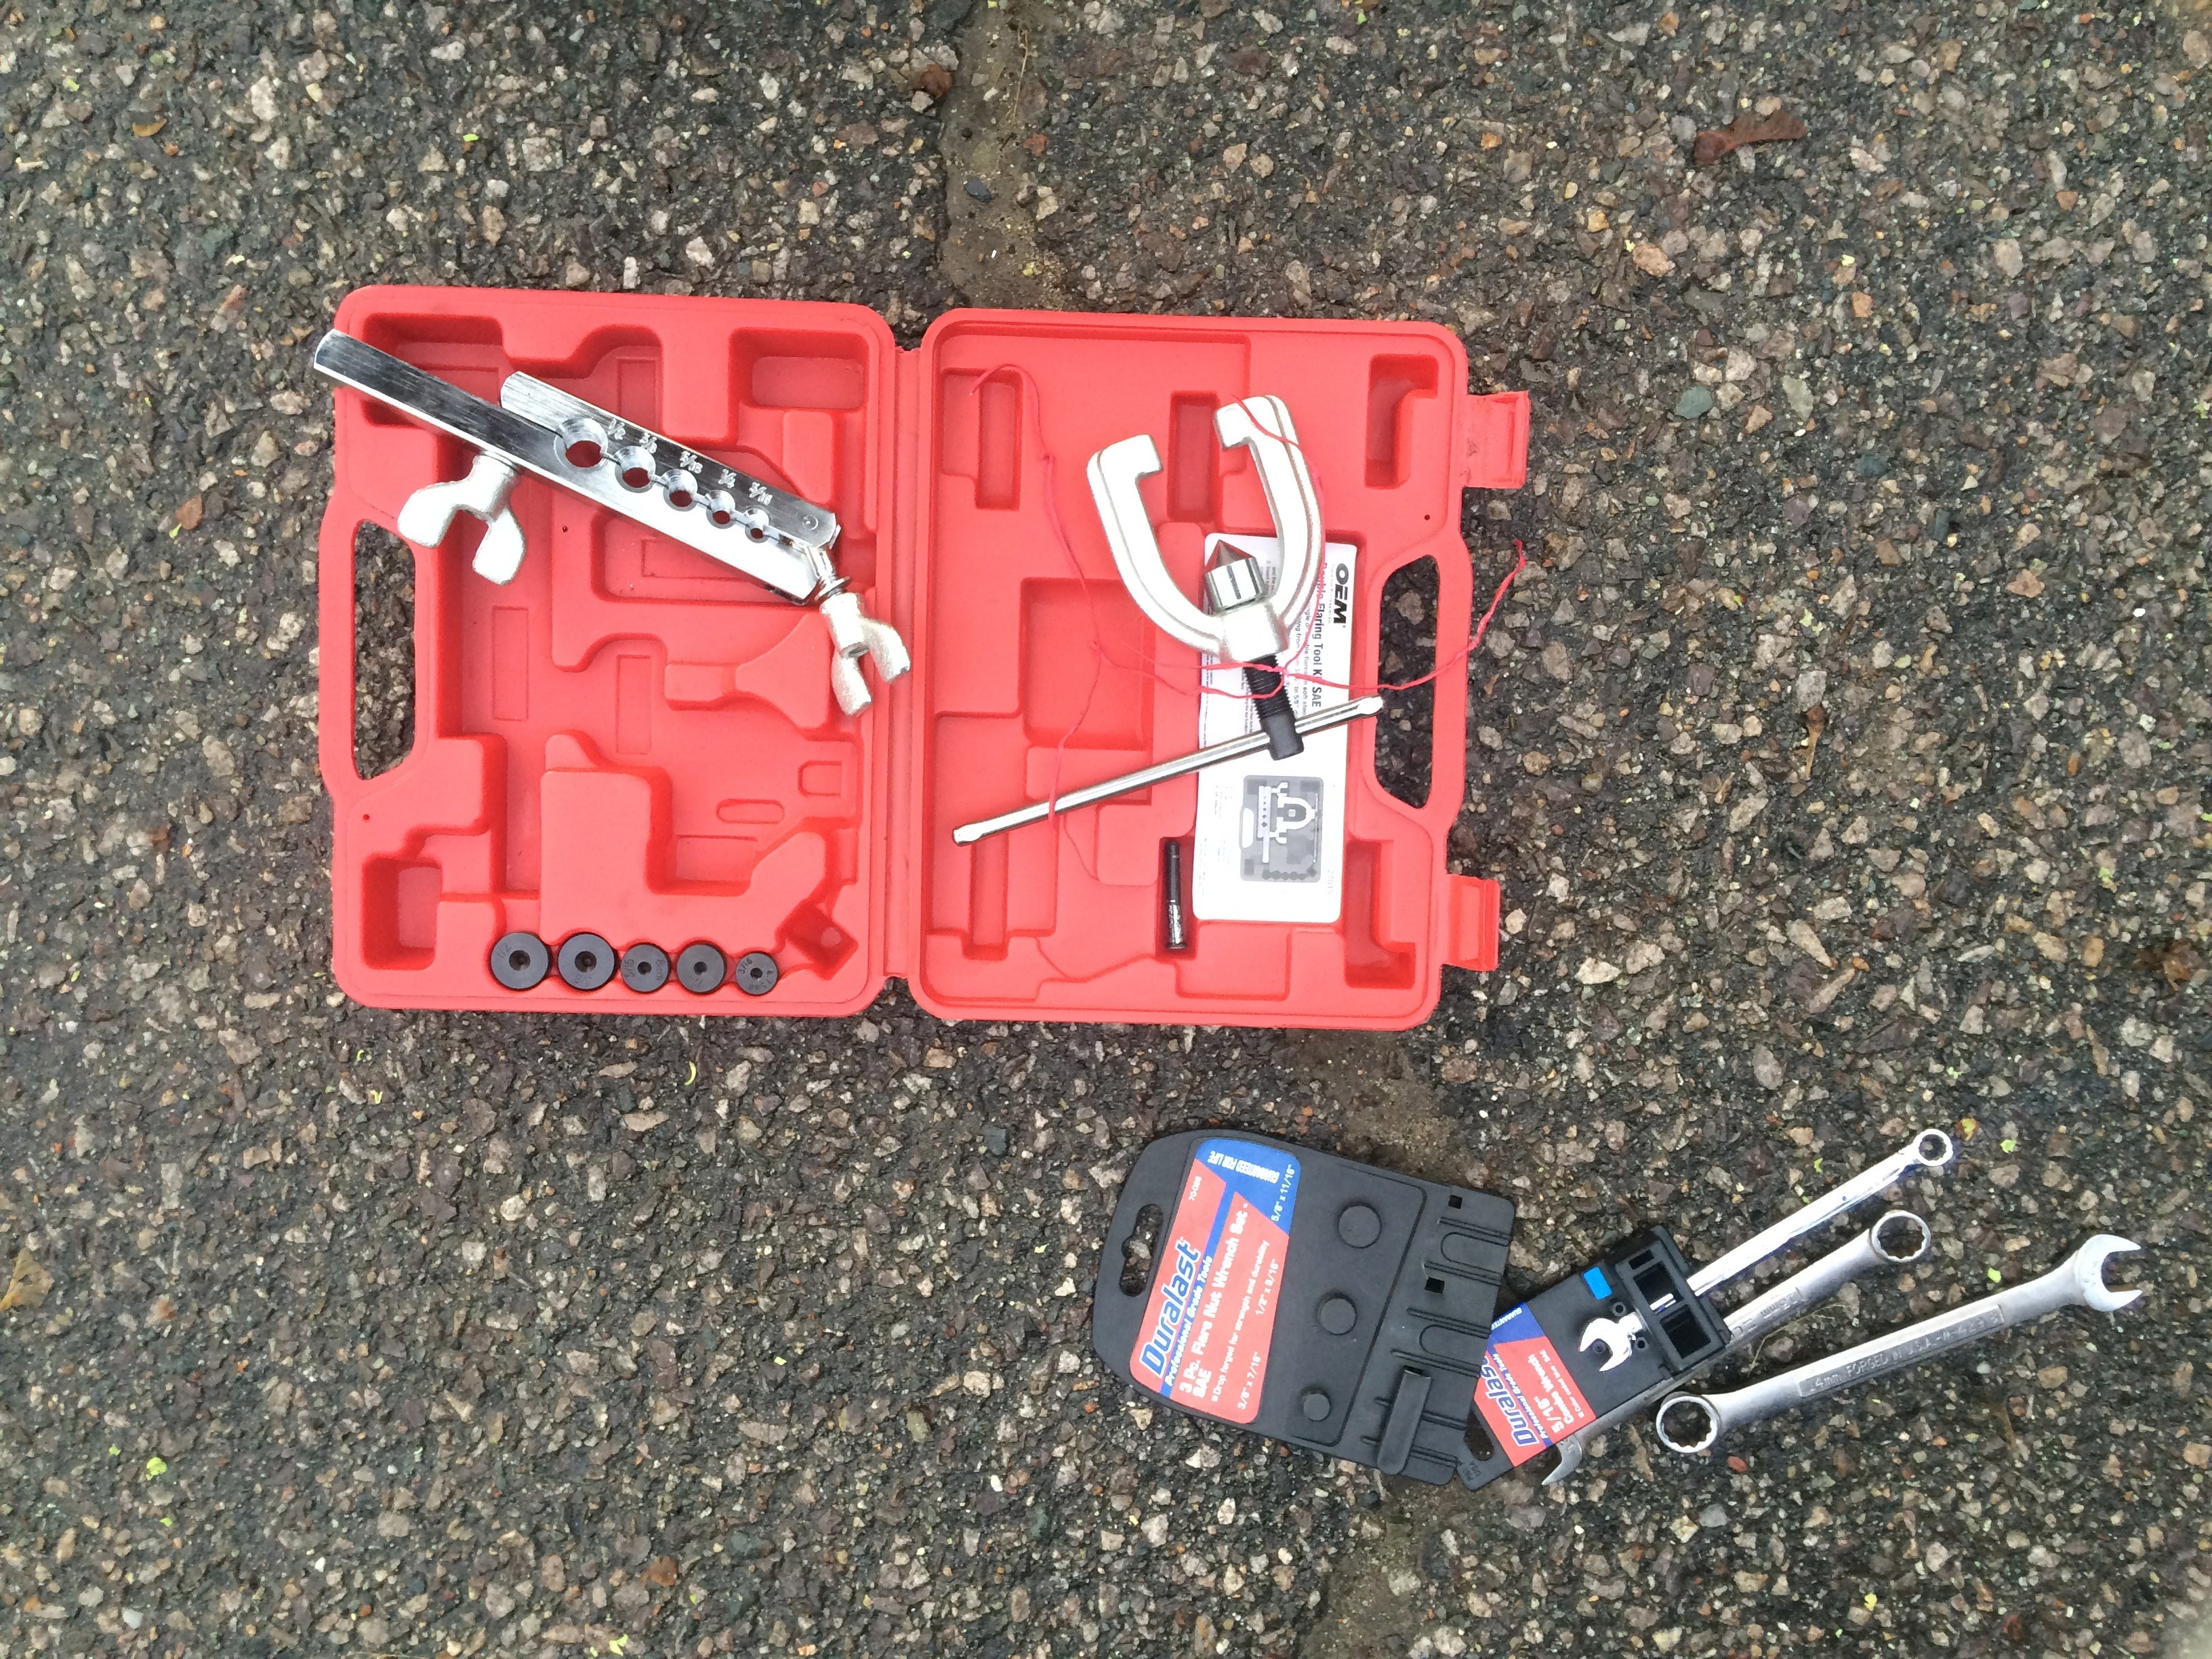
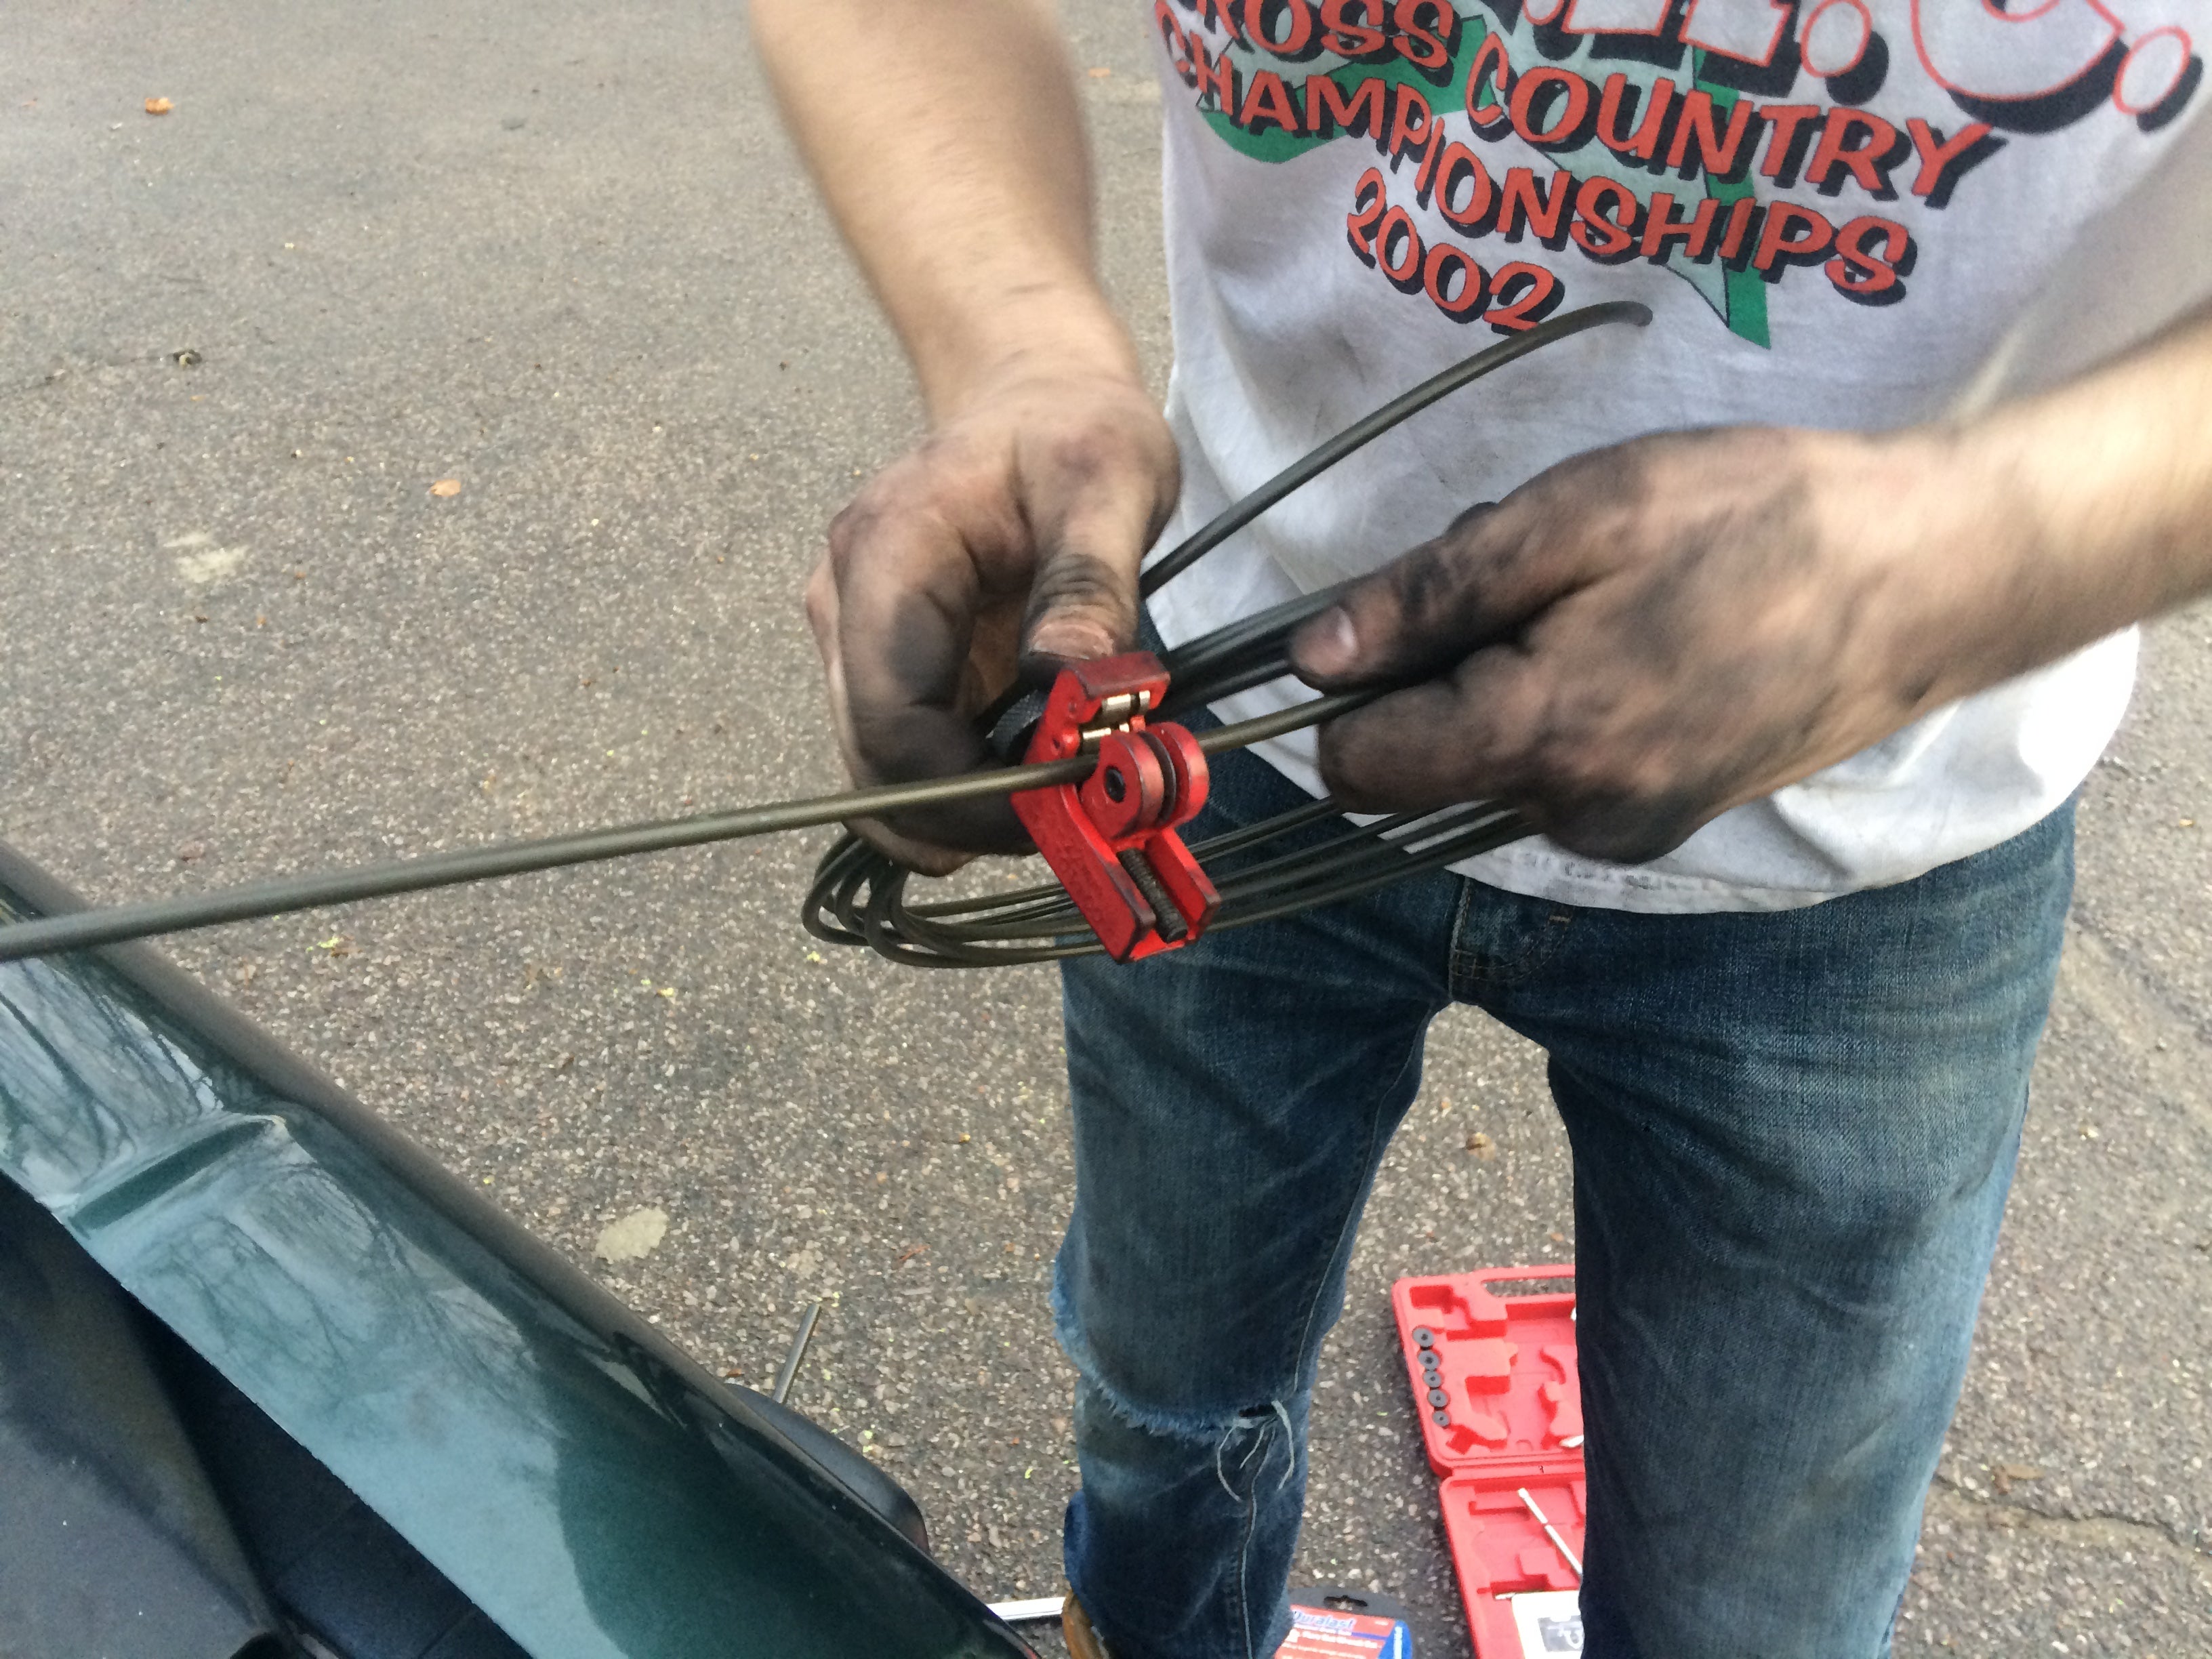
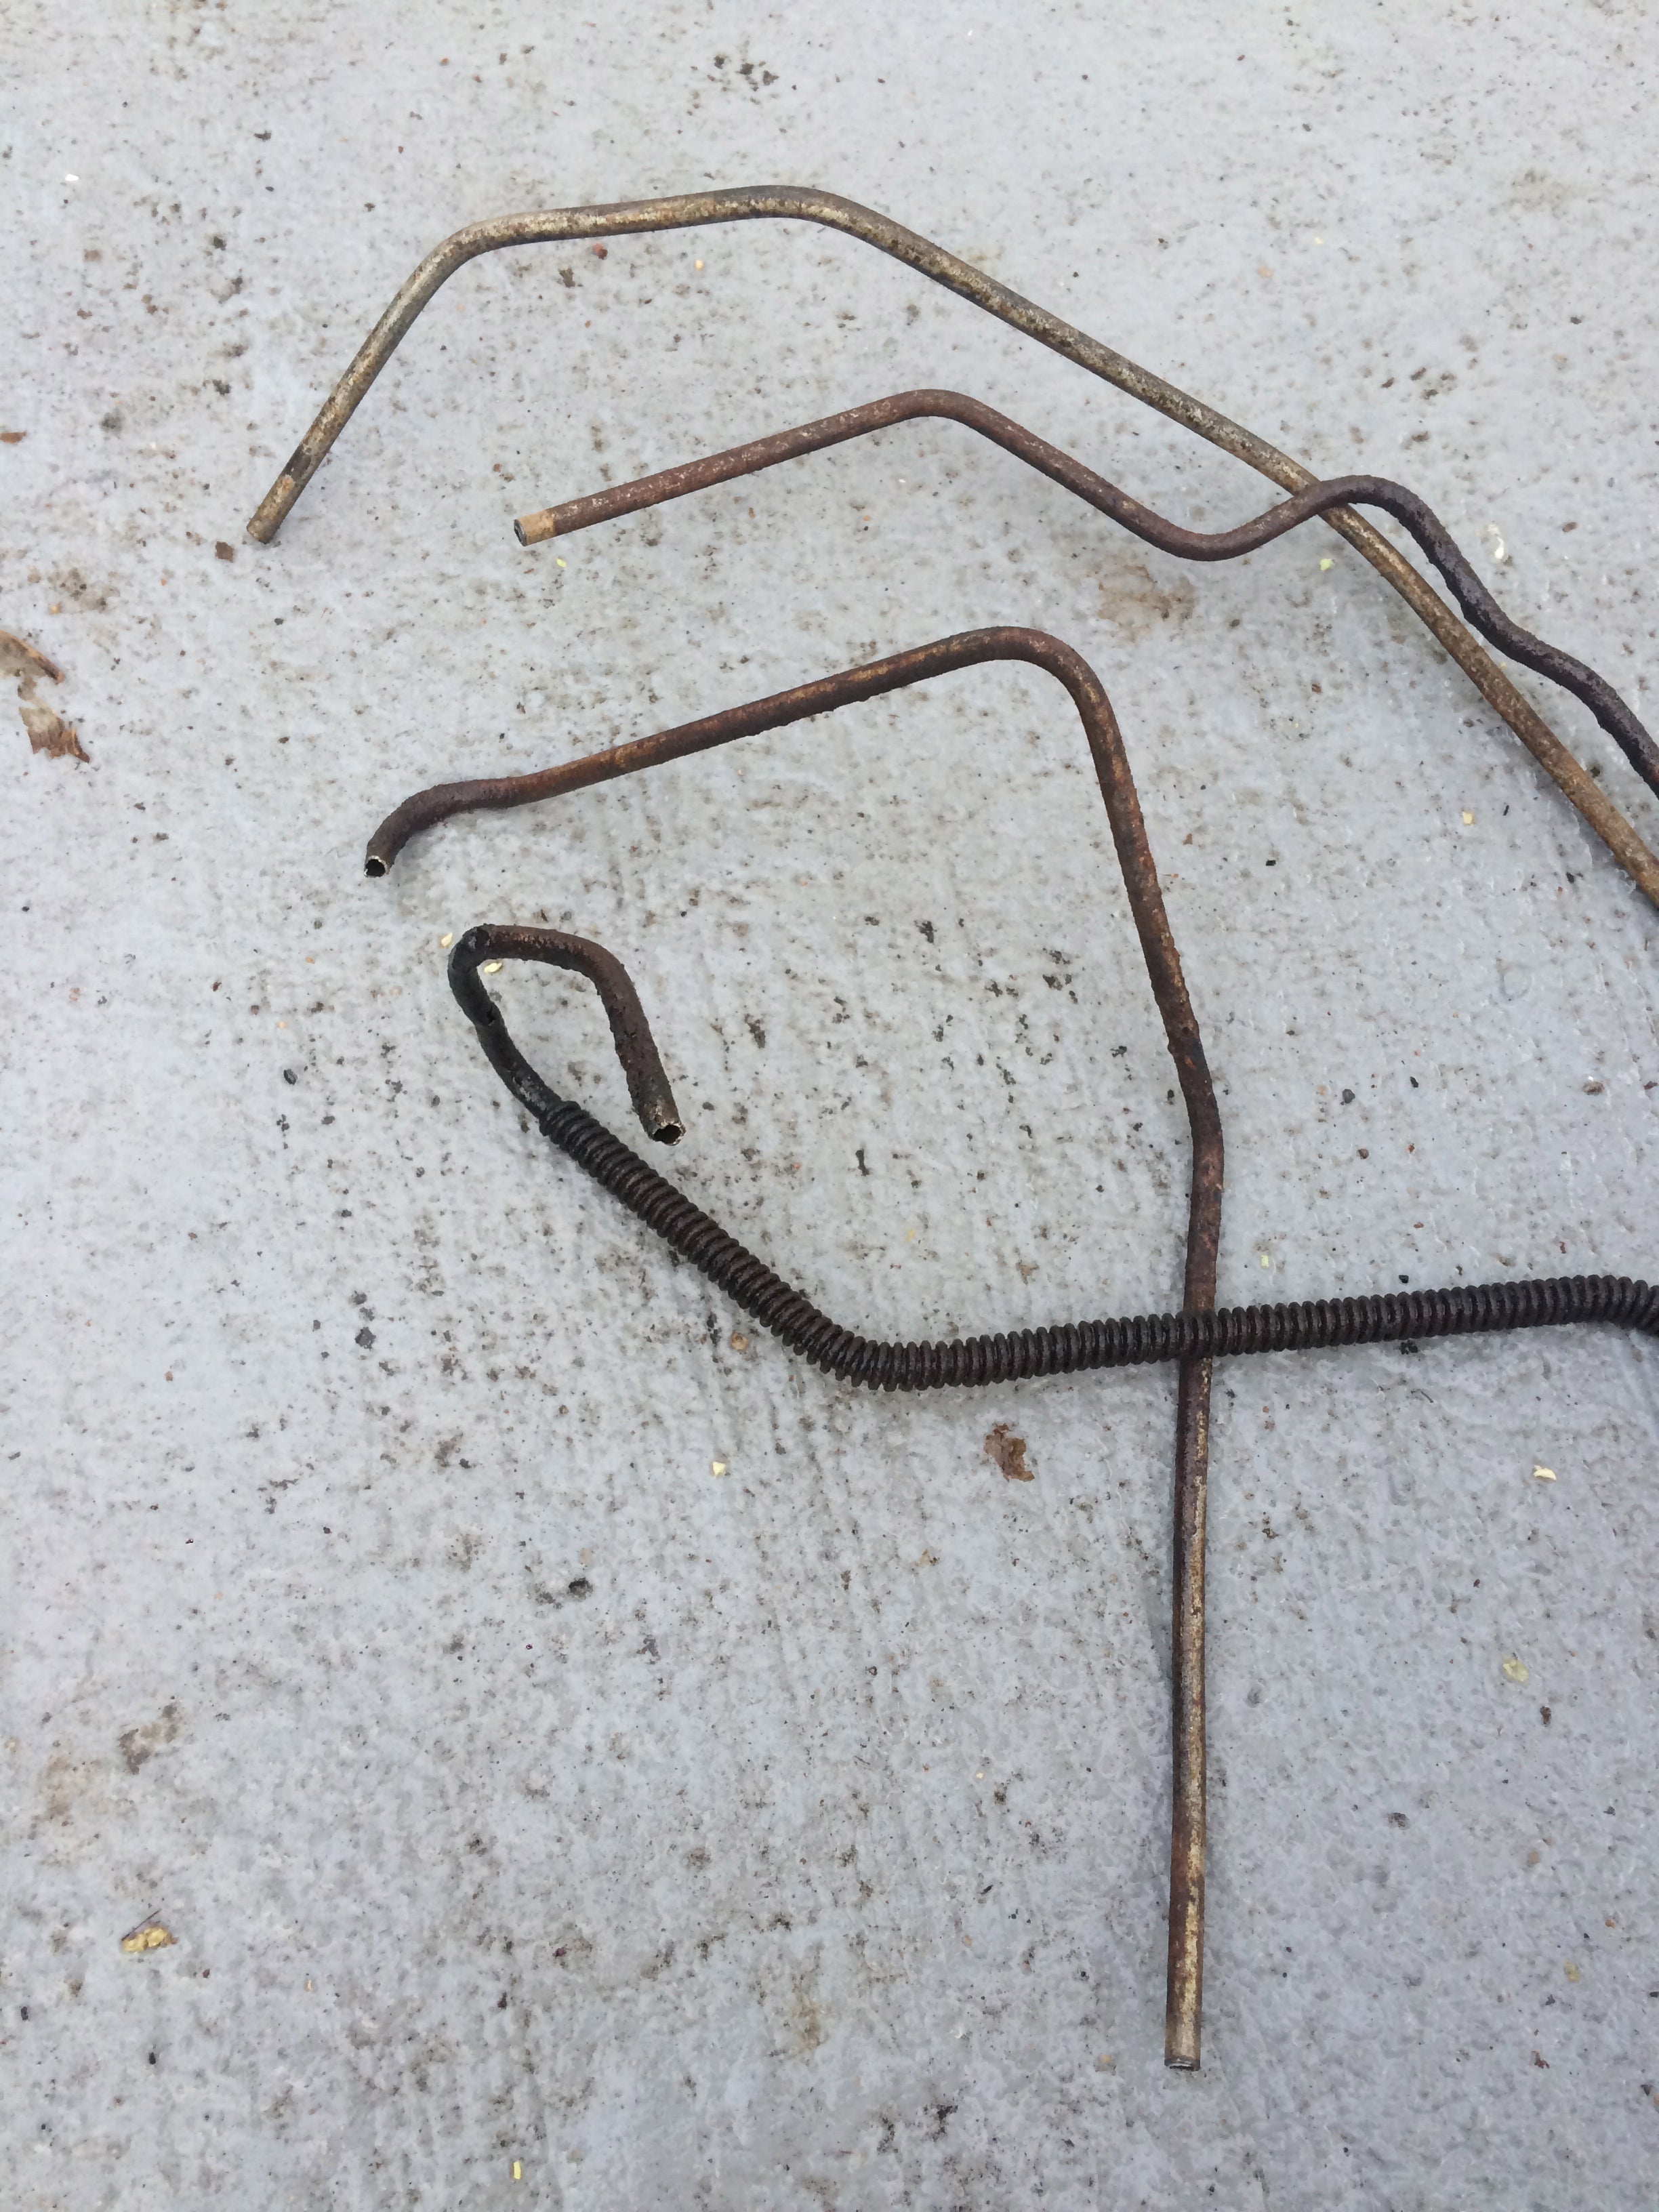
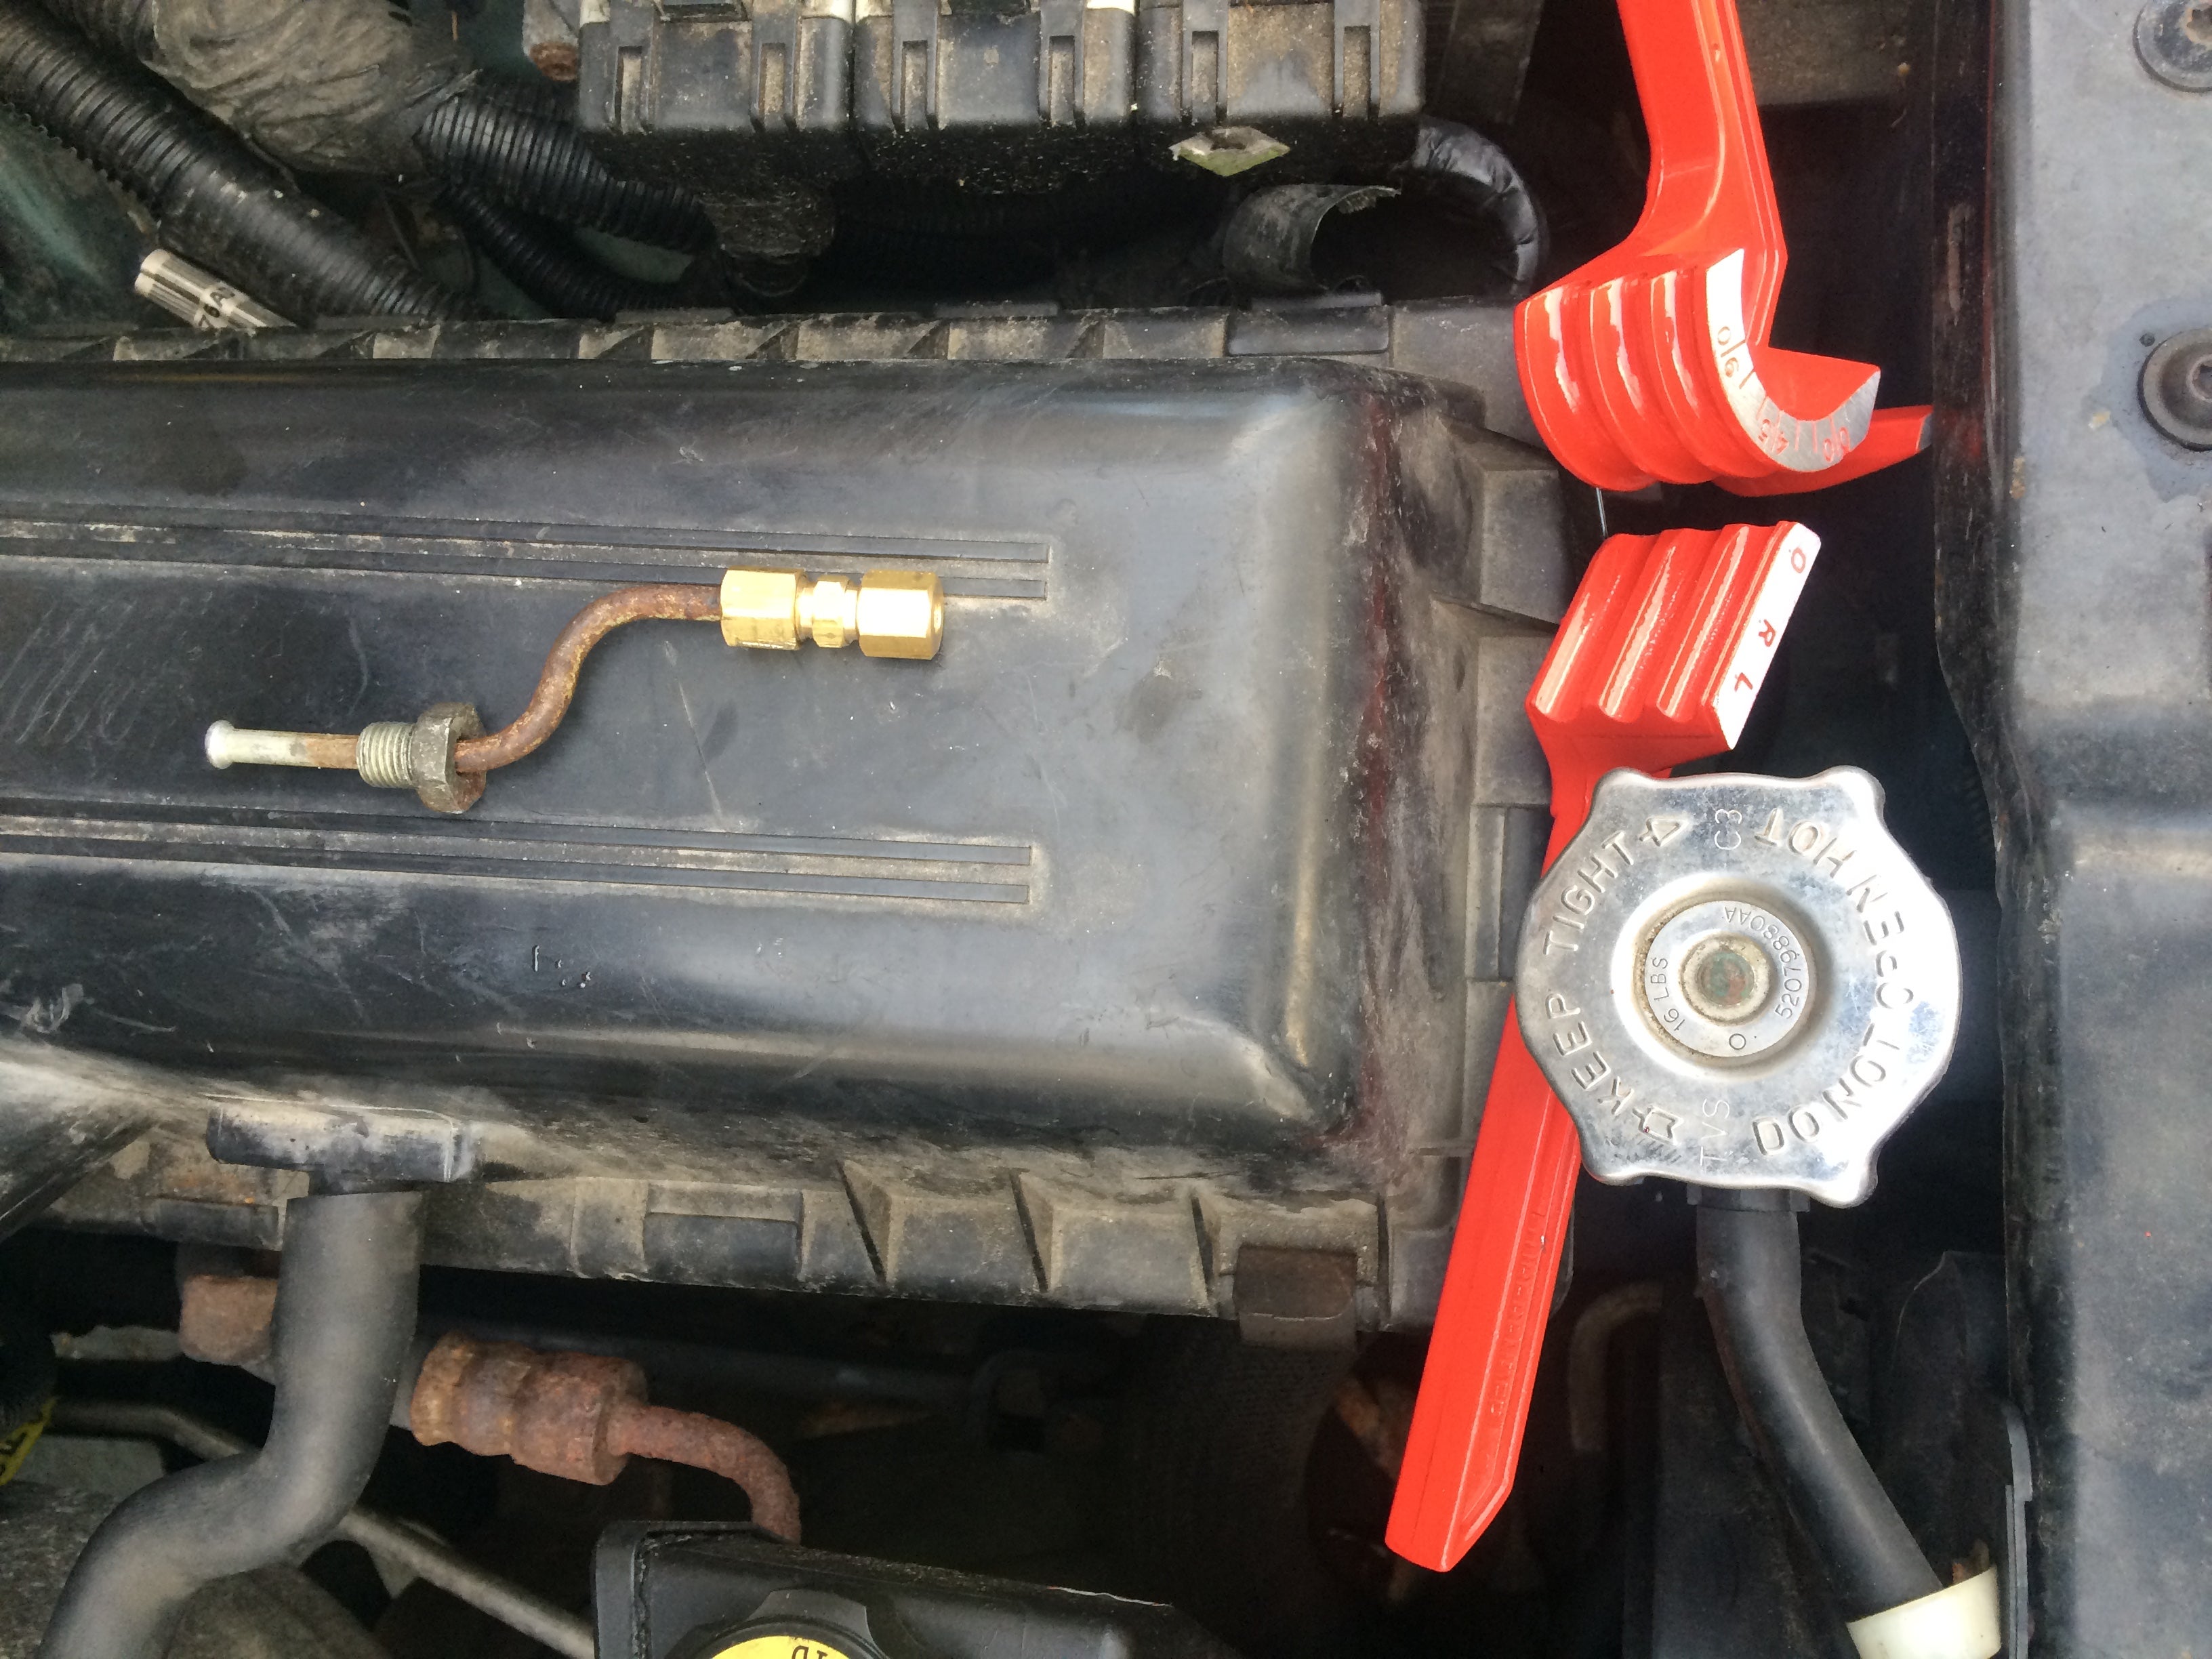
After three trips to the parts store, we had everything we needed, including this handy flaring kit. The first step was to cut up the old hard line, and finagle it out from under the wiring harness. That was the easiest part of the fix. As you can see, the line was pretty dangerous. Multiple areas were bubbling up and leaking:
The flaring tool kit was a cool purchase, but it wasnĺt perfect. The flares it created were too large, so we couldnĺt reattach the line to the underside of the combination valve. Bonus: since we couldnĺt see what was going on, it took my friend ~20 minutes of fiddling before he realized why it wasnĺt threading.
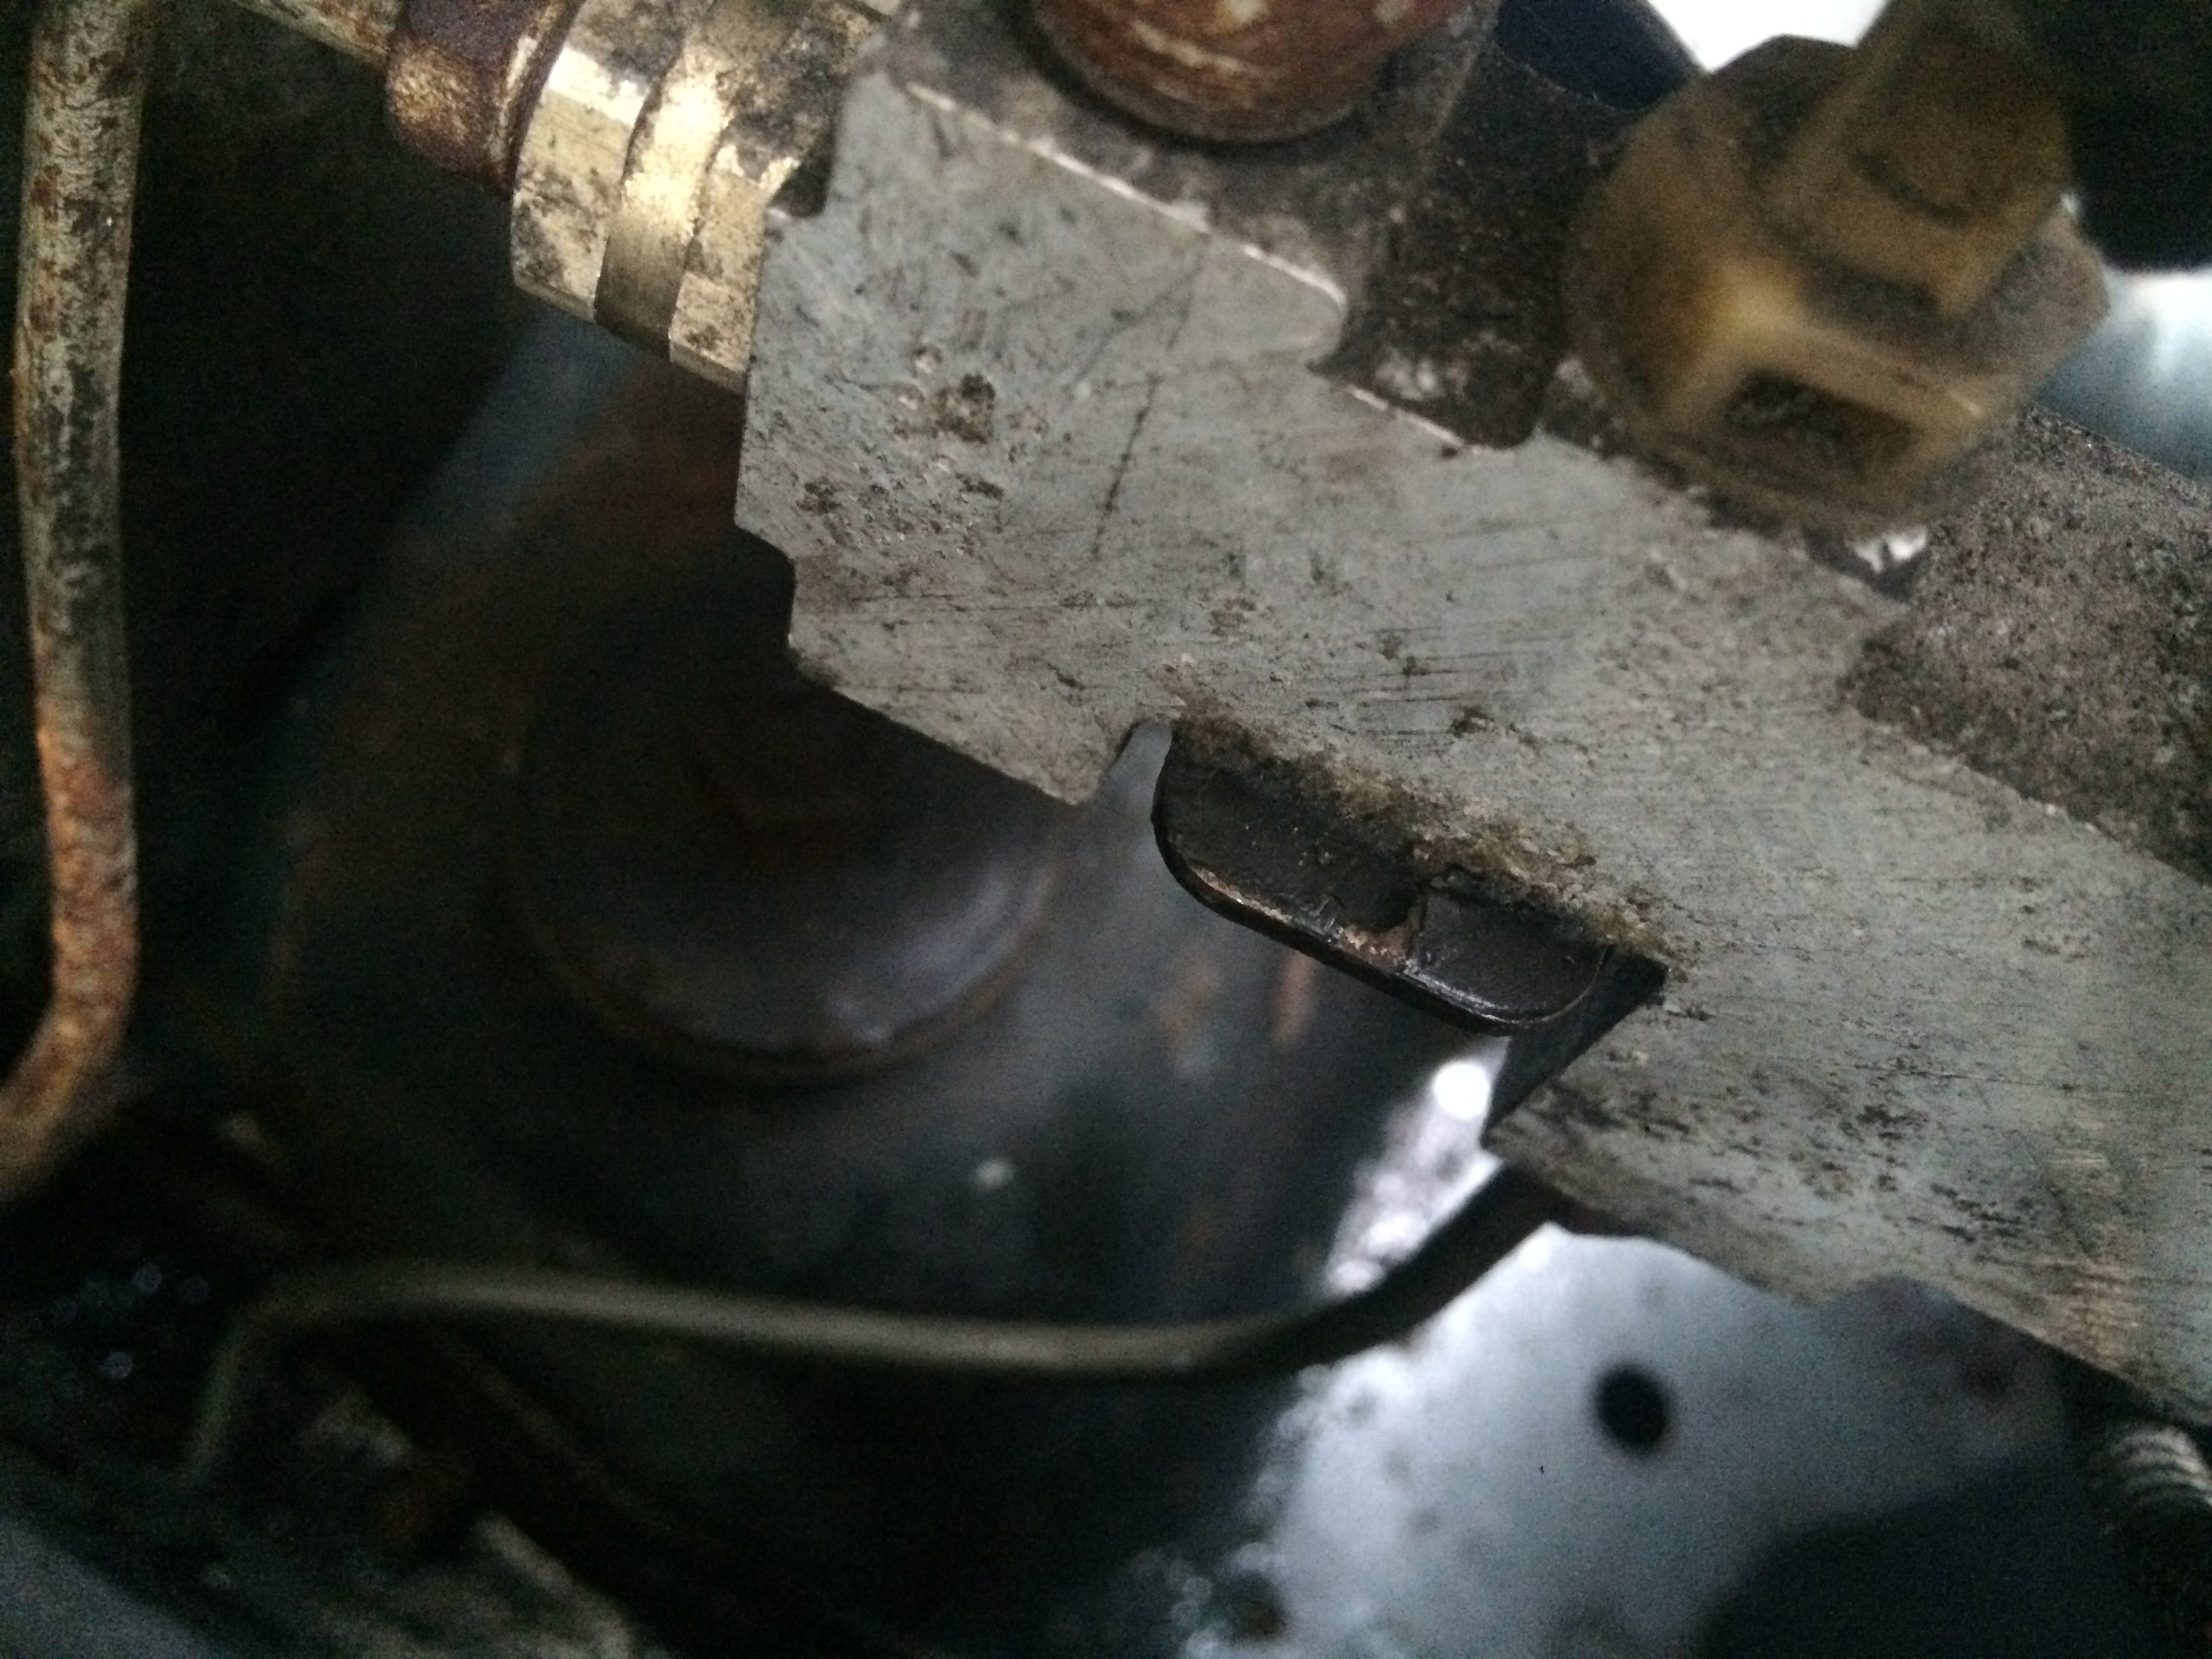
The solution? Try to salvage the combination valve side of the original line because it had a flare we could use. That section was free of corrosion, so we threw a connector on one end, and threaded it in instantaneously.
After that, roadkill style brake line fabrication ensued. This fix didnĺt have to be pretty. It was Christmas Eve, and that Jeep needed to make it to his parentsĺ house on time. His brother needed a ride because heĺs addicted to motorcycles and therefore doesnĺt own a car. Oh, and there were the presents too, including a massive grill for their dad that wasnĺt going anywhere without the Jeep.
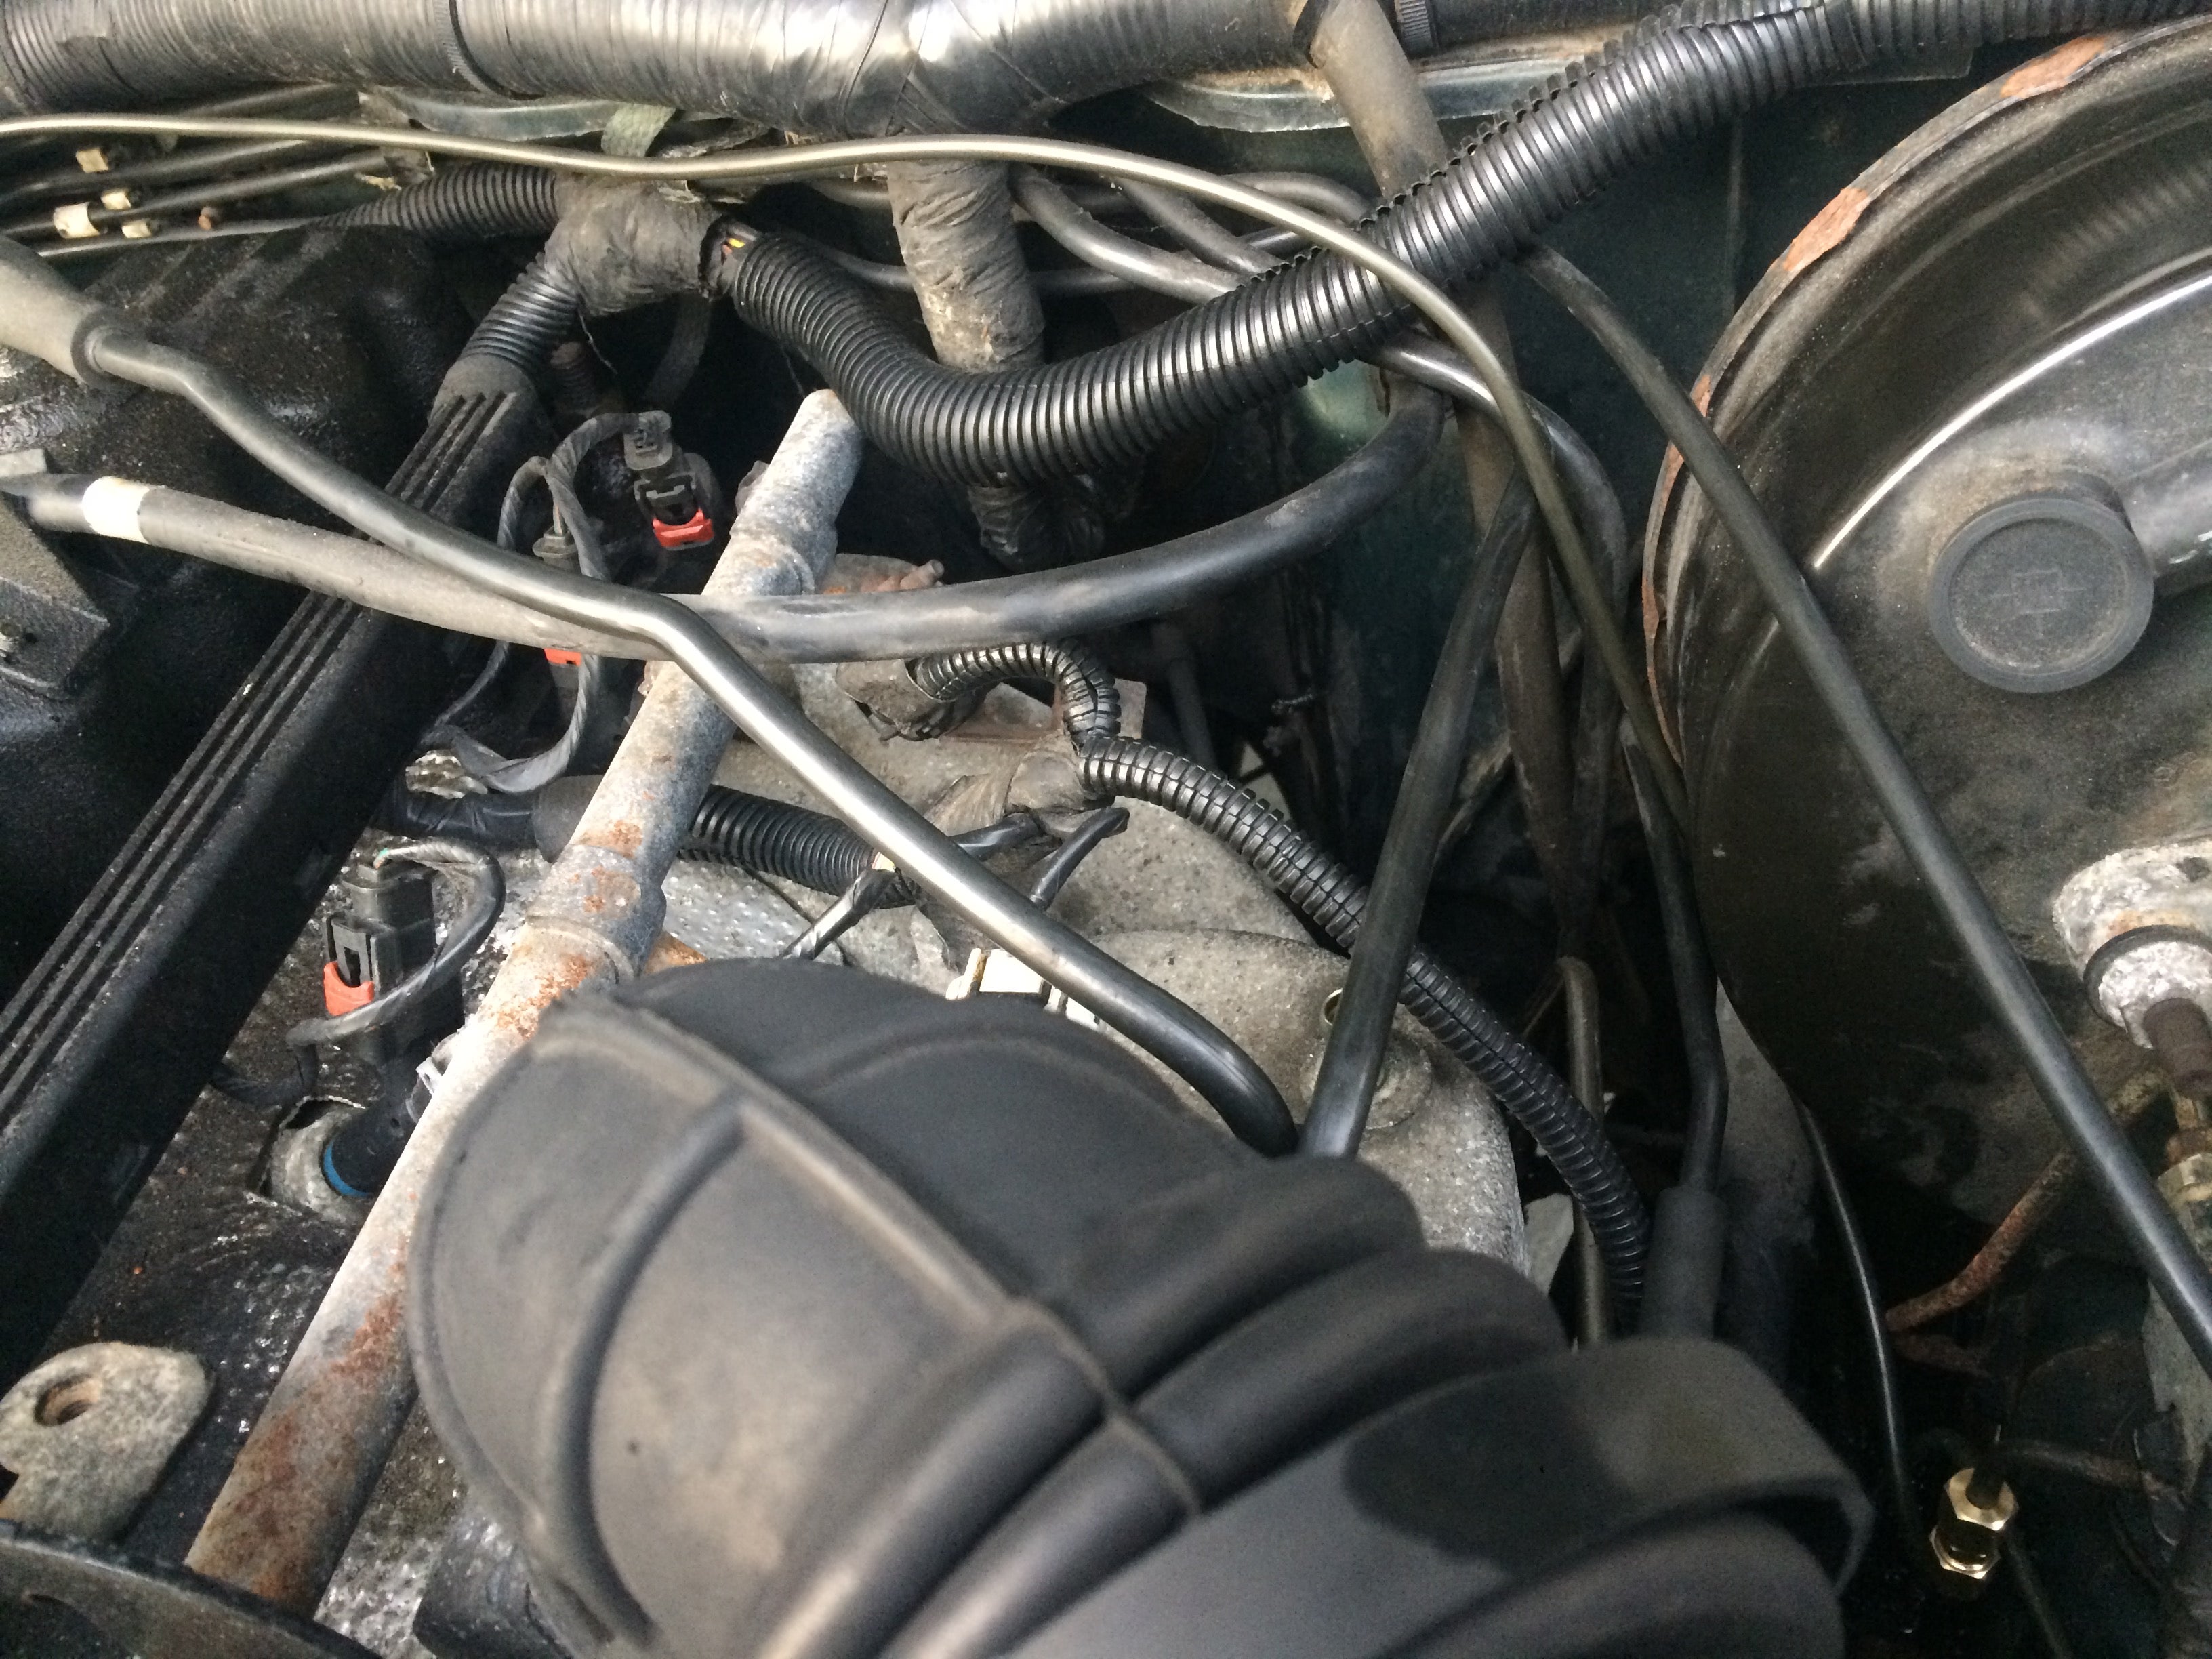
Hereĺs the finished product. Itĺs the conspicuously wavy pipe meandering gracefully over the valve cover at the top of the frame, below the wiring harness. Not a perfect fix, but it worked! We bled the brakes to the best of our ability (two of the bleed screws were being uncooperative), and my friend tested the system via slamming on the brakes in his driveway a few times. Thatĺs good enough, right?
Christmas was saved! My buddy, his biker bro, and their stash of presents made it to their parentsĺ house at 8:30 PM after a solid 6 hours of wrenching. Naturally, car guys tend to get pretty stressed out when this kind of thing happens. But we donĺt freeze like a deer in the headlights and order a Zipcar. We persevere because we understand that no matter how daunting a situation seems, you shouldnĺt give up until youĺve exhausted all of your options. And that, my friends, is one of the most valuable lessons you can learn from working on cars.
 Party-vi
> Noah - Now with more boost.
Party-vi
> Noah - Now with more boost.
01/04/2016 at 14:13 |
|
ôMy buddy recently purchased an XJ Cherokee to save himself from his horrendously unreliably 250K mile E36 stance project.ö
This is like moving out of a house that is on fire into an apartment that is on fire.
 DrJohannVegas
> Party-vi
DrJohannVegas
> Party-vi
01/04/2016 at 14:14 |
|
And moving all your belongings in gasoline-soaked boxes.
|
Noah - Now with more boost.
> Party-vi
01/04/2016 at 14:19 |
|
I actually LOLĺd. Thanks for that, youĺre on fire today.
 shop-teacher
> Noah - Now with more boost.
shop-teacher
> Noah - Now with more boost.
01/04/2016 at 14:28 |
|
I had to do this a couple months ago when my newly purchased Roadmaster popped a hole in one of the hard lines on the rear end. The flaring tool from the NAPA didnĺt work, because it didnĺt have the right die for my size hard line. Harbor Frieght of all places saved the day with their cheapo kit that did have the right size. It was the first time Iĺd done any of this kind of work, but I was able to get it going again!
|
Noah - Now with more boost.
> shop-teacher
01/04/2016 at 14:34 |
|
Yeah this kit had the right size, but the flares were always a few millimeters too large, or too small, so the nut would slip off. Theyĺre pretty fun to use though. Shaping metal with a hand tool is satisfying. Also, Roadmasters FTW.
 RamblinRover Luxury-Yacht
> Noah - Now with more boost.
RamblinRover Luxury-Yacht
> Noah - Now with more boost.
01/04/2016 at 14:39 |
|
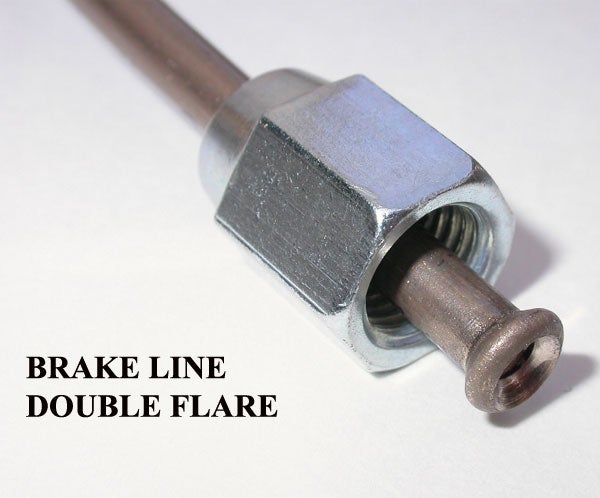
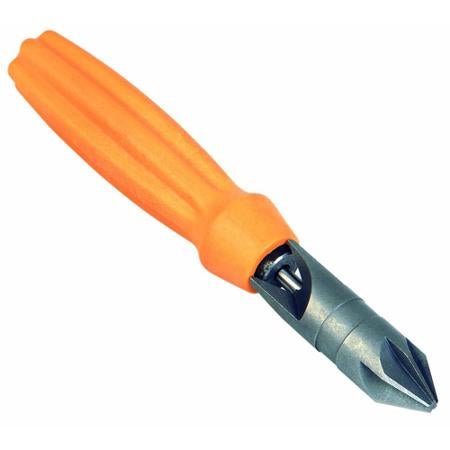
That compression fitting is a liability, but if itĺs working for now... The correct way to put an end on a line (a double flare) is hideously difficult to get right with most tools - Iĺve been doing it for years and still only get a really good flare maybe 50% of the time. The most important part is the chamfering of the brake line, but do they give you a tool for that, so you donĺt have to fuck around with a file? Of course not.
|
Noah - Now with more boost.
> RamblinRover Luxury-Yacht
01/04/2016 at 14:41 |
|
And did we have a file? Of course not.
 crowmolly
> Noah - Now with more boost.
crowmolly
> Noah - Now with more boost.
01/04/2016 at 14:43 |
|
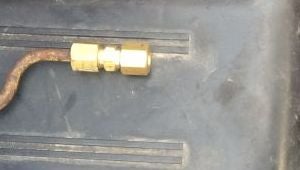
Do not use these on a braking system. Especially on corroded line. Flare and tube nuts only. It is even illegal in some areas and (some) counter workers will refuse to sell them with brake parts.
Good move with the cunifer line. Much easier to work with. Mild steel isnĺt terrible and stainless is brutal.
|
Noah - Now with more boost.
> crowmolly
01/04/2016 at 14:51 |
|
Don't worry it isn't a permanent fix, all of the lines will be redone ASAP. Thanks though.
|
RamblinRover Luxury-Yacht
> Noah - Now with more boost.
01/04/2016 at 14:52 |
|
The idea with the double flare, to have a clean metal surface to push up against the cone and a fixed-diameter ôbulgeö with a double thickness of metal for the nut to push on, depends on having a smooth clean metal surface of thinned tubing that will first flare out and then shrink back down properly and into the center of the line. A lot of people do a single flare, but itĺs just not reliable.
The part in double flaring, though, where that tapered end of the line is ground down to the exact right angle and thickness, 100% smooth, and is then kept perfectly centered to the reflaring die? ABSOLUTELY HORRIBLE. If thereĺs too little taken off, it fights all the way and likes to roll off-center, and if thereĺs too much taken off, it doesnĺt form the shoulder properly and doesnĺt give you a good seating surface. If the angle is wrong, it just swells. If itĺs off-center, it can look mostly right and then just never seal. All this could be fixed with a $3 chamfering tool (blade or rasp style) set at the right angle, but ha ha, fuck you, no. They just donĺt give you one.
|
Noah - Now with more boost.
> RamblinRover Luxury-Yacht
01/04/2016 at 14:56 |
|
Yeah this tool made double flares. Technically... the second round of compression usually pushed the pipe backwards before the flare became rounded... typical cheap Autozone kit.
|
RamblinRover Luxury-Yacht
> Noah - Now with more boost.
01/04/2016 at 15:02 |
|
A correct chamfer reduces the amount of pressure you need... some. 3/16ö line is still the hardest to get right and requires the tool to be almost unbelievably tight on the line... so you have to make sure the lineĺs the right depth exactly. Iĺve used cheap crappy kits and pretty good ones, but there sadly isnĺt much ease of use difference. You know how with some things, you use a proper professional grade tool and your eyes are opened, like ôhow was I even surviving? That other tool is just wrong!ö. Yeah, doesnĺt happen with brake flaring. It all sucks, short of a clamping hydraulic end grinder/former of some kind, probably $1500. Whatever a professional line shop would have.
|
Noah - Now with more boost.
> RamblinRover Luxury-Yacht
01/04/2016 at 15:10 |
|
Yeah having the right tool for the job is a struggle for us 20 somethings. On a budget + no garage = fixing things on the street with whatever you have in your apartment. If this situation were to arise again handing the brake line flaring over to a machine shop would make a lot of sense!
|
RamblinRover Luxury-Yacht
> Noah - Now with more boost.
01/04/2016 at 15:17 |
|
Well, Iĺm not a twenty-something as of about a month ago, but my dad has put a lot of effort into having a good shop over the years. Which isnĺt to say Iĺve been a stranger to the broke and stranded fix - my
favorite
was having to replace glow plugs on a VW diesel 4 hours from home in the dark while it was snowing.
|
crowmolly
> RamblinRover Luxury-Yacht
01/04/2016 at 15:19 |
|
Greasing the pin can help too. Anything to lessen the friction. But if you get that on the grippy parts of the kit... good luck.
|
Noah - Now with more boost.
> RamblinRover Luxury-Yacht
01/04/2016 at 15:26 |
|
Haha wow that sounds outrageously stressful - we lucked out with the weather, that was the first time Iĺve worn a T shirt in Boston during the middle of winter. Convenient!
 vicali
> Noah - Now with more boost.
vicali
> Noah - Now with more boost.
01/04/2016 at 15:34 |
|
As a college student with a non-existant repair/towing budget - I may or may not have used the broken line to create a Ĺplugĺ by folding it over a few times and clamping it with vice grips. This allowed the brake system to be bled up and travel the short distance from boondocks to a brake shop where the proper line could be replaced.
90% of the brakes are the front anyways right? I think I still have that plug in my toolbox, even though the truck has been gone for 15 years now..
|
Noah - Now with more boost.
> vicali
01/04/2016 at 15:39 |
|
Lol! Now THAT is haggard. Sounds terrifying, I would have driven with a death grip on the e brake.
 Bullitt Ride
> Noah - Now with more boost.
Bullitt Ride
> Noah - Now with more boost.
01/04/2016 at 15:59 |
|
Doing these on car fixes is really a bit of an art, and there are a few little tricks that make a big difference in making a successful flare:
-after cutting the line on the car with the pipe cutting tool clamp it in the flaring tool clamp with only a hair sticking up past and file it so that itĺs flush and flat with the surface of the clamp.
-when you do clamp the line in the clamp bar, make sure to use a screwdriver or something thatĺll fit between the wings on the wing nut to make sure the line is good and clamped
-use the file to break the sharp edge on the OD of the line and chamfer the ID using a tool similar to this
-put a dab of wheel bearing grease or even brake fluid on the tip of the line to be formed, the forming surface on the die, and the pointed tip on the puller, without it youĺll wear out the die and itĺll be a lot harder to form a nice even flare
-even if it takes a dozen tries, make sure the forming die is a square as possible when you start to push on it
-while forming, if you do notice the die starting to tilt... which typically means the flare is botched... put a small screw driver or something thatĺll fit between the clamp bar and the side of the die that is lower and keep turning until the die is squared back up again, most of the time the flare is salvageable if you catch it soon enough.
-and the most important tip... always make sure to check that you slid the new fitting onto the line before you start flaring... nothing is worse than having to cut off a perfectly good flare and starting over because you forgot to put the new fitting on the line.... been there, done that lol.
|
Bullitt Ride
> Noah - Now with more boost.
01/04/2016 at 16:00 |
|
Doing these on car fixes is really a bit of an art, and there are a few little tricks that make a big difference in making a successful flare:
-after cutting the line on the car with the pipe cutting tool clamp it in the flaring tool clamp with only a hair sticking up past and file it so that itĺs flush and flat with the surface of the clamp.
-when you do clamp the line in the clamp bar, make sure to use a screwdriver or something thatĺll fit between the wings on the wing nut to make sure the line is good and clamped
-use the file to break the sharp edge on the OD of the line and chamfer the ID using a tool similar to this

-put a dab of wheel bearing grease or even brake fluid on the tip of the line to be formed, the forming surface on the die, and the pointed tip on the puller, without it youĺll wear out the die and itĺll be a lot harder to form a nice even flare
-even if it takes a dozen tries, make sure the forming die is a square as possible when you start to push on it
-while forming, if you do notice the die starting to tilt... which typically means the flare is botched... put a small screw driver or something thatĺll fit between the clamp bar and the side of the die that is lower and keep turning until the die is squared back up again, most of the time the flare is salvageable if you catch it soon enough.
-and the most important tip... always make sure to check that you slid the new fitting onto the line before you start flaring... nothing is worse than having to cut off a perfectly good flare and starting over because you forgot to put the new fitting on the line.... been there, done that lol.
 Sweet Trav
> Noah - Now with more boost.
Sweet Trav
> Noah - Now with more boost.
01/04/2016 at 16:29 |
|
Dont know if this has been said or not, but brass compression fittings, in-line for brake use is dangerous, this should be a temporary fix only.
|
shop-teacher
> Bullitt Ride
01/04/2016 at 16:59 |
|
Thanks for the tips! That will make things easier next time!
|
shop-teacher
> Noah - Now with more boost.
01/04/2016 at 17:03 |
|
Iĺm wondering if maybe (and I mean maybe, cuz I dunno!) you had too much line sticking above the clamp bar when you started the flare?
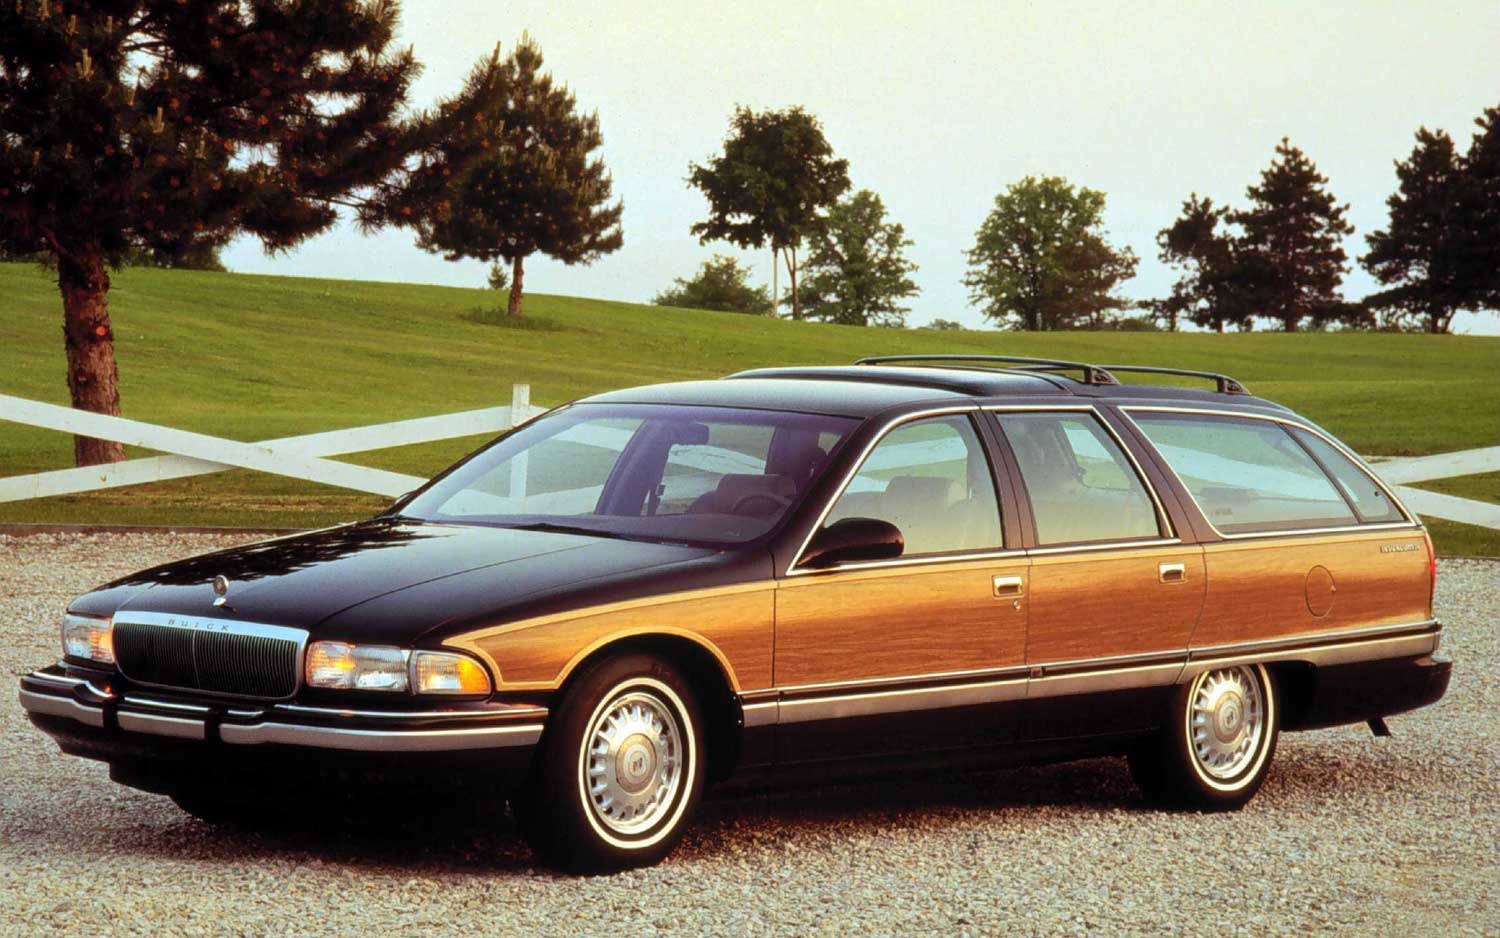
My Roadmaster is an LT-1 powered wagon with the towing package. I LOVE that car!!
 Urambo Tauro
> Noah - Now with more boost.
Urambo Tauro
> Noah - Now with more boost.
01/04/2016 at 17:38 |
|
Have you ever tried working with NiCopp brake tubing? I think youĺd like it.
|
Noah - Now with more boost.
> Bullitt Ride
01/04/2016 at 20:58 |
|
Lol yeah a couple flares were made without a fitting on the line. Whoops!
|
Noah - Now with more boost.
> Urambo Tauro
01/04/2016 at 21:00 |
|
Nope! Interesting stuff though, haven't heard of it
|
Noah - Now with more boost.
> Sweet Trav
01/04/2016 at 21:01 |
|
Yep that line will be re done ASAP
|
Urambo Tauro
> Noah - Now with more boost.
01/04/2016 at 21:15 |
|
I love it. My local Carquest carries it, but other stores do too.
The softer metal is much easier to work with, whether youĺre bending, flaring, or just trying to get a good seal. The corrosion resistance is a huge plus too.